Friday 27 September 2013

Zulu! How I made Rorke's Drift

When I did a dry run of the Rorke's Drift scenario, I realised I didn't have enough fence hexes to make the walls, and had to proxy with other hex designs. Then I recalled I had some resin walls that I hadn't painted... From there, it was a slippery slope to having a 3D Rorke's Drift for my Battle Cry board.
Dry run showing woods as walls
The final result- much better!

The walls and crates


The walls are from Battlefield Accessories, sprayed Army Painter Skeleton Bone, washed Woodland Scenics Raw Umber, and drybrushed Jo Sonja's Cashmere. Each segment is 9x1cm.

The crates are resin from the late Battle Works Studios.
Unpainted resin. This is one set; I used two.

The buildings


Using a plasticard base, I sketched in a rough floorplan for the hospital and storehouse. I tried to capture the key essence of each building, while making the necessary compromises between scale, accuracy, and game-ability. The walls are from a brick-embossed styrofoam sheet I picked up at a model railway store. Expensive, but versatile, lightweight and easy to work with. I didn't measure anything, I just eyeballed and cut the walls until they fitted. The roofs are separate, with PVA-soaked tissue paper as the roofing material covering plasticard. I spackled up the walls with Jo Sonja's Texture Paste. I happened to have a plastic staircase in my scenery bits box, which was perfect for the storehouse. Matchsticks made the verandah post for the hospital. The buildings were painted Jo Sonja's Cashmere, and washed with Woodland Scenics Raw Umber and Concrete.


Floorplan sketches

Brick-embossed styrofoam

Spackled
The storehouse

The hospital

The redoubt


A bit more rectangular than the original, this was a compromise to fill the two hexes. I built up the base with some GW 40mm square bases and a bit of Das modelling clay, then built the mealie bag wall from green stuff. These were layered sausages, flattened, and a knife blade used to push down between the bags. I'm sure there's a better way to do it, and I wouldn't make a tabletop's worth of scenery like this, but for a one-off, it's fine. A wash brought out the shadows nicely. It turned out better looking than I anticipated, suitably hasty.


A note on scale

I'm happy with these pieces, I'm sure they'll turn up in my 15mm games now...
Peter Pig 15mm modern Africa

Eureka 15mm modern Russians

The walls are marketed as 15-20mm, and are a bit small for 28mm, but they will suit The Shire!

GW Hobbits and Gripping Beast Vikings

Finally

This marks the end of my Zulu project- thanks for reading and commenting, it has long been this wargamer's dream to get Rorke's Drift on the tabletop!


Zulu! Rorke's Drift rules ideas

I played my Rorke's Drift game solo using Bayernkini's scenario for Battlecry. Here are my thoughts and tweaks.

Solo rules


I played the Rorke's Drift game the same fashion as the Isandlwana game, i.e. AI vs AI. Each AI side draws two cards and plays the best one. 'Fightback' was removed from the deck.

Variant 1: Play the British 'properly' against an AI Zulu side. The Zulus draw and activate two cards per turn (no unit may be activated twice). Zulu 'Fightback' gets held in hand, and played at the first available opportunity.

Variant 2: Play the British 'properly' against an AI Zulu side. The Zulus get +1D for every attack. Zulu 'Fightback' gets held in hand, and played at the first available opportunity.

Minor scenario changes


I made the following changes and clarifications to the scenario as given (none of which should alter the game or outcome):
  • Change the eight adjacent hill hexes to woods
  • Remove the Kraal and outbuilding
  • Each hex in the redoubt gives -1D to attacks from any direction except from the other redoubt hex.
  • In the reorganisation between waves, the British player may not merge or create new units, nor may he redistribute men between units (I think I broke this between Waves 2 and 3)
  • In a two-player game (or solo variant where the British player plays against an AI Zulu), the British player may return any or all of his hand to the deck, and redraw to a full hand. The Zulu player must replace his entire hand.


 Optional Character rules


These have not been playtested and I didn't use them in my game. I just thought it would be fun to add a few more characters with special abilities to the British side. Each character replaces one  infantryman in one element, and has a special ability that may be used at the player's discretion, so long as the character is still alive.
  • Colour-Sergeant Bourne: May ignore all retreats.
  • Reverend Smith: May ignore one retreat.
  • Acting Assistant Commissary Dalton: Once per game, this unit hits on Sabres in ranged combat.
  • Private Hook: Hook can only be killed like a leader, i.e. if his unit is wiped out he will survive, and needs a second attack (with crossed sabres) to kill him.
  • Leftenant Adendorff: Once per game, may force any Zulu unit to reroll any or all dice.

Bourne, Dalton, Adendorff

James Dalton

Dennis Folbige as Acting Assistant Commissary Dalton

Gert van den Bergh as Leftenant Adendorff, Natal Native Contingent


Frank Bourne

Nigel Green as Colour-Sergeant Bourne
Detail from de Neuville's painting
Reverend George Smith
James Booth as Private Hook
Henry Hook

Other optional scenario rules


These are also unplaytested, but add a bit of flavour:

Fire!
If the Zulus end up in control of both halves of a building, they may attempt to set it alight. To do this, they must make an attack from inside the building against which they are attacking, hitting it as if it were artillery (including crossed sabres). It has three 'wounds', which can be represented with fire markers. Three wounds on each segment will destroy the building (cannot be subsequently entered). This prevents the British from recovering lost soldiers. Before it has been destroyed, British troops may attempt to save the building by entering it and fighting the fire- roll as if it were artillery, each hit (including crossed sabres) removes a fire counter. The British also get one attempt per building segment on fire during the between-wave intervals.
Litko smoke and flame markers

Build the redoubt.
The redoubt is only available for the third wave (leave it off the board for the first two waves), but reduces attacks by 2D.

Final installment: Building Rorke's Drift

Zulu! Rorke's Drift

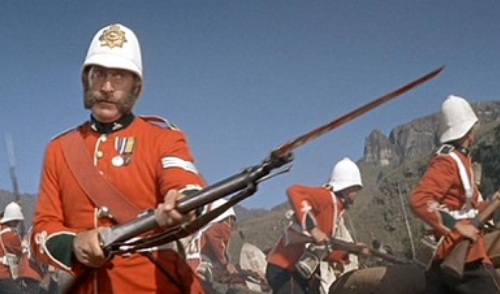
If twelve hundred men couldn't hold a defensive position this morning, what chance have we with one hundred?
Lt Bromhead, Zulu

The news of the disaster at Isandlwana has spread to the British force at the Rorke's Drift mission station. Sentries are pulled back in after they report the Zulus are coming...

As per Bayernkini's scenario, the British (forty men plus two officers) have to fight off three attack waves. A wave is fought off if four Zulu elements are destroyed. The Zulus then completely reset, while the British may return some casualties, and arrange their remaining forces as they see fit.

Scenario map showing deployment
Rorke's Drift mission station.
Hospital in the foreground, redoubt and storehouse in the distance

The First Wave


The Zulus rapidly assault Chard's men by the hospital.
By the redoubt, a weaker Zulu force is held off from the wall.
The force in the hospital takes many casualties, but fights off the wave.
In the first wave, the main assault comes at the hospital end, but is countered. The British take thirteen casualties, but recover three, leaving thirty (plus the officers) to defend the station. They are then redistributed between the hospital end, under Chard, and the storehouse end, under Bromhead.

The Second Wave

British disposition for the second attack.

The Zulus rush the centre.
The Zulu leader, in a captured jacket, faces off against Gonville Bromhead.
Bromhead withdraws to the redoubt...
... and has to abandon it to the Zulus!
Things are looking grim as the British are forced into the courtyard...
...but Bromhead and Chard are just able to repulse this wave.
After the first wave, the British were cautiously optimistic. But the Zulus launched a rapid and massive assault that tore apart the defenders by the redoubt. Bromhead barely escaped, and the British were just able to destroy the necessary four elements and prevent being torn apart themselves. The British took a devastating twenty-five casualties, and only recovered one, leaving just six redcoats and the two officers to try and survive the third wave.

The Third and Final Wave


The remaining British prepare their last stand by the redoubt.
The Zulus come straight at them.
Chard desperately tries to pick off stragglers as Bromhead retreats into the redoubt.
The last defenders of Rorke's Drift, immediately before their deaths.

This wave was never going to be easy. The Zulus didn't take their time to build up an unstoppable force, however, and charged straight for the British. The British were only one kill away from taking out a third element, and only needed to take out four elements to survive... but not today.

Chard and Bromhead meet their downfall in the redoubt
This game was a great last stand. The British held off the first wave fairly comfortably, but got ripped apart by the second. I didn't think they were going to make it, but eked out some kills to survive into the third wave. They only had two understrength units left, and I almost didn't play the third wave as the conclusion was certain, but the British surprised me with accurate shooting, taking out two elements and having a third down to only one man. But the Zulus were too many, and the fall of Rorke's Drift becomes a minor footnote to the Battle of Isandlwana.


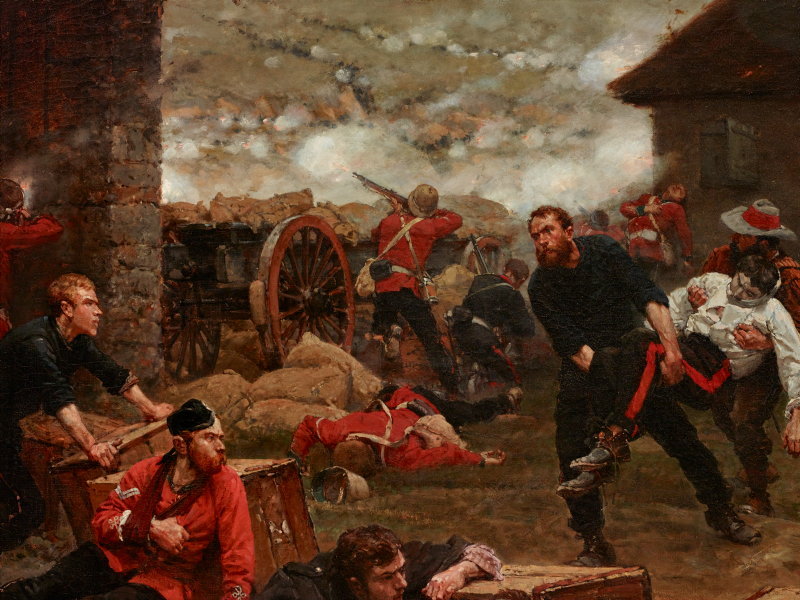
The defence of Rorke's Drift 1879, by de Neuville. Somehow, this has been at the Art Gallery of New South Wales since 1882.

Next: Scenario rules, variants and ideas

Friday 20 September 2013

Zulu! Isandlwana


I can see it still, the great jagged rock of the 'Little House' rearing up above the stony, sun-baked African plain, the scattered lines of our red-coated infantry, joking and cat-calling among themselves as they waited for the ammunition that never came; the red-capped Natal Kaffirs scurrying back to take their position on the rocky slope; a black-tunicked rider of Frontier Horse leaping the gun limbers bellowing a fatuous order to laager the wagons, which went unheeded and was too late by hours; Pulleine fumbling with his field glasses and shouting hoarsely: "Is that a rider from Lord Chelmsford?"; a colour-sergeant frantically hammering at the lid of an ammunition box; the puffs of smoke from our advanced line firing steadily at the Zulu skirmishers; the rattle of musketry over the ridge to the left; the distant figures of Durnford's men on the right flank falling back, firing as they came; a voice croaking: "Oh, dear God Almighty!"- and it was mine, as I looked nor'east over the ranks of the 24th, and saw the skyline begin to move, like a brown blanket stirred by something beneath it, and then all along the crest there was the rippling, twinkling flash of thousands of spear-points, and a limitless line of white and coloured shields with nodding plumes behind them, rank after rank, and down the forward slope came the black spilling tide of Ketshwayo's impis, twenty thousand savages rolling towards our pitiful position with its far-stretched line of defenders.

Say what you will about General Sir Harry Flashman V.C., he knew how to write.

The dry Nyogane donga separates the adversaries

N Battery anchors the British centre, next to Pulleine and the Colours.

Situation at the start of the battle.
The initial hammer blow comes from the Zulu right horn...

... but is repulsed for the loss of a unit.

The left horn attacks Zikhali's Horse and the neighbouring infantry.

The Zulu main body assaults through the donga...

...and swarms through a hole in the British line!

The British centre crumbles.

The Colours and the gunners make their last stand as the flanks collapse back.

Pulleine stands alone. The remnants of the British force prepare to die.
Battle of Isandlwana, 22 January 1879 by Charles Fripp.
What a cracker of a game! An initial strong Zulu assault on the British left was repulsed, but then a strong 'Forced March' brought overwhelming numbers into the centre. That was the decisive moment of the battle. The British right then collapsed, and the remnants of the centre and left were ground down. Durnford and the NNH were the last to die, at the foot of Isandlwana.

The basic scenario is as per Bayernkini. I added the following 'solo' rules to fight two AIs against one another:
  • Zulus draw two cards each turn and play the most favourable, discard the other.
  • British roll a D6: on a 6 they only draw one card, otherwise play as per the Zulus (this represents the British having a Command of 5 compared to the Zulu's 6)
  • Remove Fightback from the deck

Next time: Rorke's Drift!

Acknowledgements:

First picture
Last picture
See Fripp's painting at the National Army Museum