Showing posts with label making terrain. Show all posts

Friday, 19 January 2024

How to make swamps

I made some generic swamps for any scale or period. In this tutorial I'll show you how I went about it. This is one of those fun projects where each step looks good and just gets better as it goes along, unlike some projects which seem to get worse before they get better.

I started with some pre-cut MDF forest sabot bases from Knights of Dice (sadly, a company on hiatus). I used my trusty Dremel to hack out the insides and bevel the edges.

Pre-cut MDF forest sabot bases, unglued.


I glued the two halves together with some random offcuts and added Miliput to disguise any regularities in the curves.

After cutting and bevelling, glued together and made more irregular


I used PVA to stick on builder's sand. I then gave a light mist of PVA and IPA to further cement it down. (I could have gone heavier with the spray).

Waiting for the sand/ PVA to dry


I painted them craft paint brown, then drybrushed browns and creams. I could have skipped either of the drybrush stages. I then painted the water dark green- Contrast Dark Angel in this instance. Any dark green or brown would be fine.

Steps of colour


I then used a selection of flocks, static grass and tufts I've been accumulating over the years. I used brighter greens around the water edges, and drier colours to blend with my game boards.

Vegetation added


The final step is Deluxe Materials Aqua Magic. This is like acrylic gloss varnish, a single pour product without any mixing or heating required. I generously poured this in and let it soak up the sides into the flock. I used up the last of my bottle. I put them on a level surface and protected them from dust. Done!


Water poured and left to dry


The finished result! With hobbits for scale. I resisted the urge to add skullz, corpses, rusty bits etc to keep them generic for scale and period.


I did a test swamp before I jumped in and made more. I tried some fancy blending in the water to give a depth illusion, but it just didn't work and is unnecessary. You can see the different water colour in the picture above. More troubling was the cracking of the water. I've slightly salvaged it with a second coat of water effect, but I think more will be required and I expect to have to do it to my new swamps as well. I do need a new bottle of that stuff, anyway. I know I should probably do multiple thin coats, but I'm impatient and in a hurry.

Cracking of the water. Bug or feature?

If you've got any comments on experiences with water effect products I'd like to hear!

Oh, and also I'd like suggestions on storing them so the tufts don't get squished. I'm thinking of putting each in a greaseproof paper bag. Some sort of plate rack or CD holder?

Friday, 8 December 2023

A trial of chipping

In which I try using some Vallejo 73.214 Chipping Medium.

I had some gothic shipping containers lying about, and sprayed them AP Chaotic Red, then stippled on some orange. When dry, I liberally slapped on Chipping Medium with a brush, let that dry, and sprayed it white. After that had dried, I attacked it with a wet toothbrush. It wasn't enough, so I also used a wire brush. Again, when dry, I added some details and transfers.

Undercoated and stippled orange

It looks good, but I feel I can get a similar effect with a sponge much quicker. Furthermore, sponging on the effect gives me more predictability. It was a bit hard to control how much effect and where it would be. There's still room in my armamentarium for this.

What deathworld does this hail from?

The finished containers

Skull-o-meter™: 20

Friday, 7 October 2022

How I painted liquid hot magma

I 3D printed some vats from Stellarscapes (PLA Ender 3 0.12mm). They had a textured content, which I wanted to paint like molten metal. I thought I would paint it fiery colours on a white undercoat, then drybrush black over the top for a magma-through-the-cracks effect like my balrogs.

I started with a white Vallejo primer, then used Army Painter Speedpaints. I used the dropper bottles for a few drops of Fire Giant Orange and Blood Red onto a still wet Zealot Yellow base. The colours bled into each other in a very satisfying tie-dye fashion, and I let them dry. I was so happy with the effect I decided not to add a dark drybrush layer.

Texture is nicely visible

Zealot Yellow

Five drops of Fire Giant Orange

Two drops of Blood Red
It spreads out more and lightens as it dries

Ready for last week's battle

The texture helps the effect. You could probably get some cool effects with other colour combos- greens and blues for examples.

I had these sitting on the kitchen bench. The Skirt Swisher came past and did a double take of amazement and disappointment when she realised I had not, in fact, whipped up some crème brûlées.

Friday, 1 July 2022

GF9 Badlands

Gale Force 9 does a lovely collection of Badlands hoodoos, which I have picked up over the years. It is pre-painted, scale agnostic, well sculpted, interesting, affordable, and durable.The more recent pieces I've picked up, however, have been a considerably darker tone. And some of them had a bit of a sheen, and the bases didn't really match my Cigar Box mat.

Bases don't blend with mat

Discrepancies in tone

So I pulled out the craft paints and big brushes:


Not perfect, but better than they were. I could add some tufts- maybe another day. Now you go do the hoodoo that you do so well!

Friday, 24 June 2022

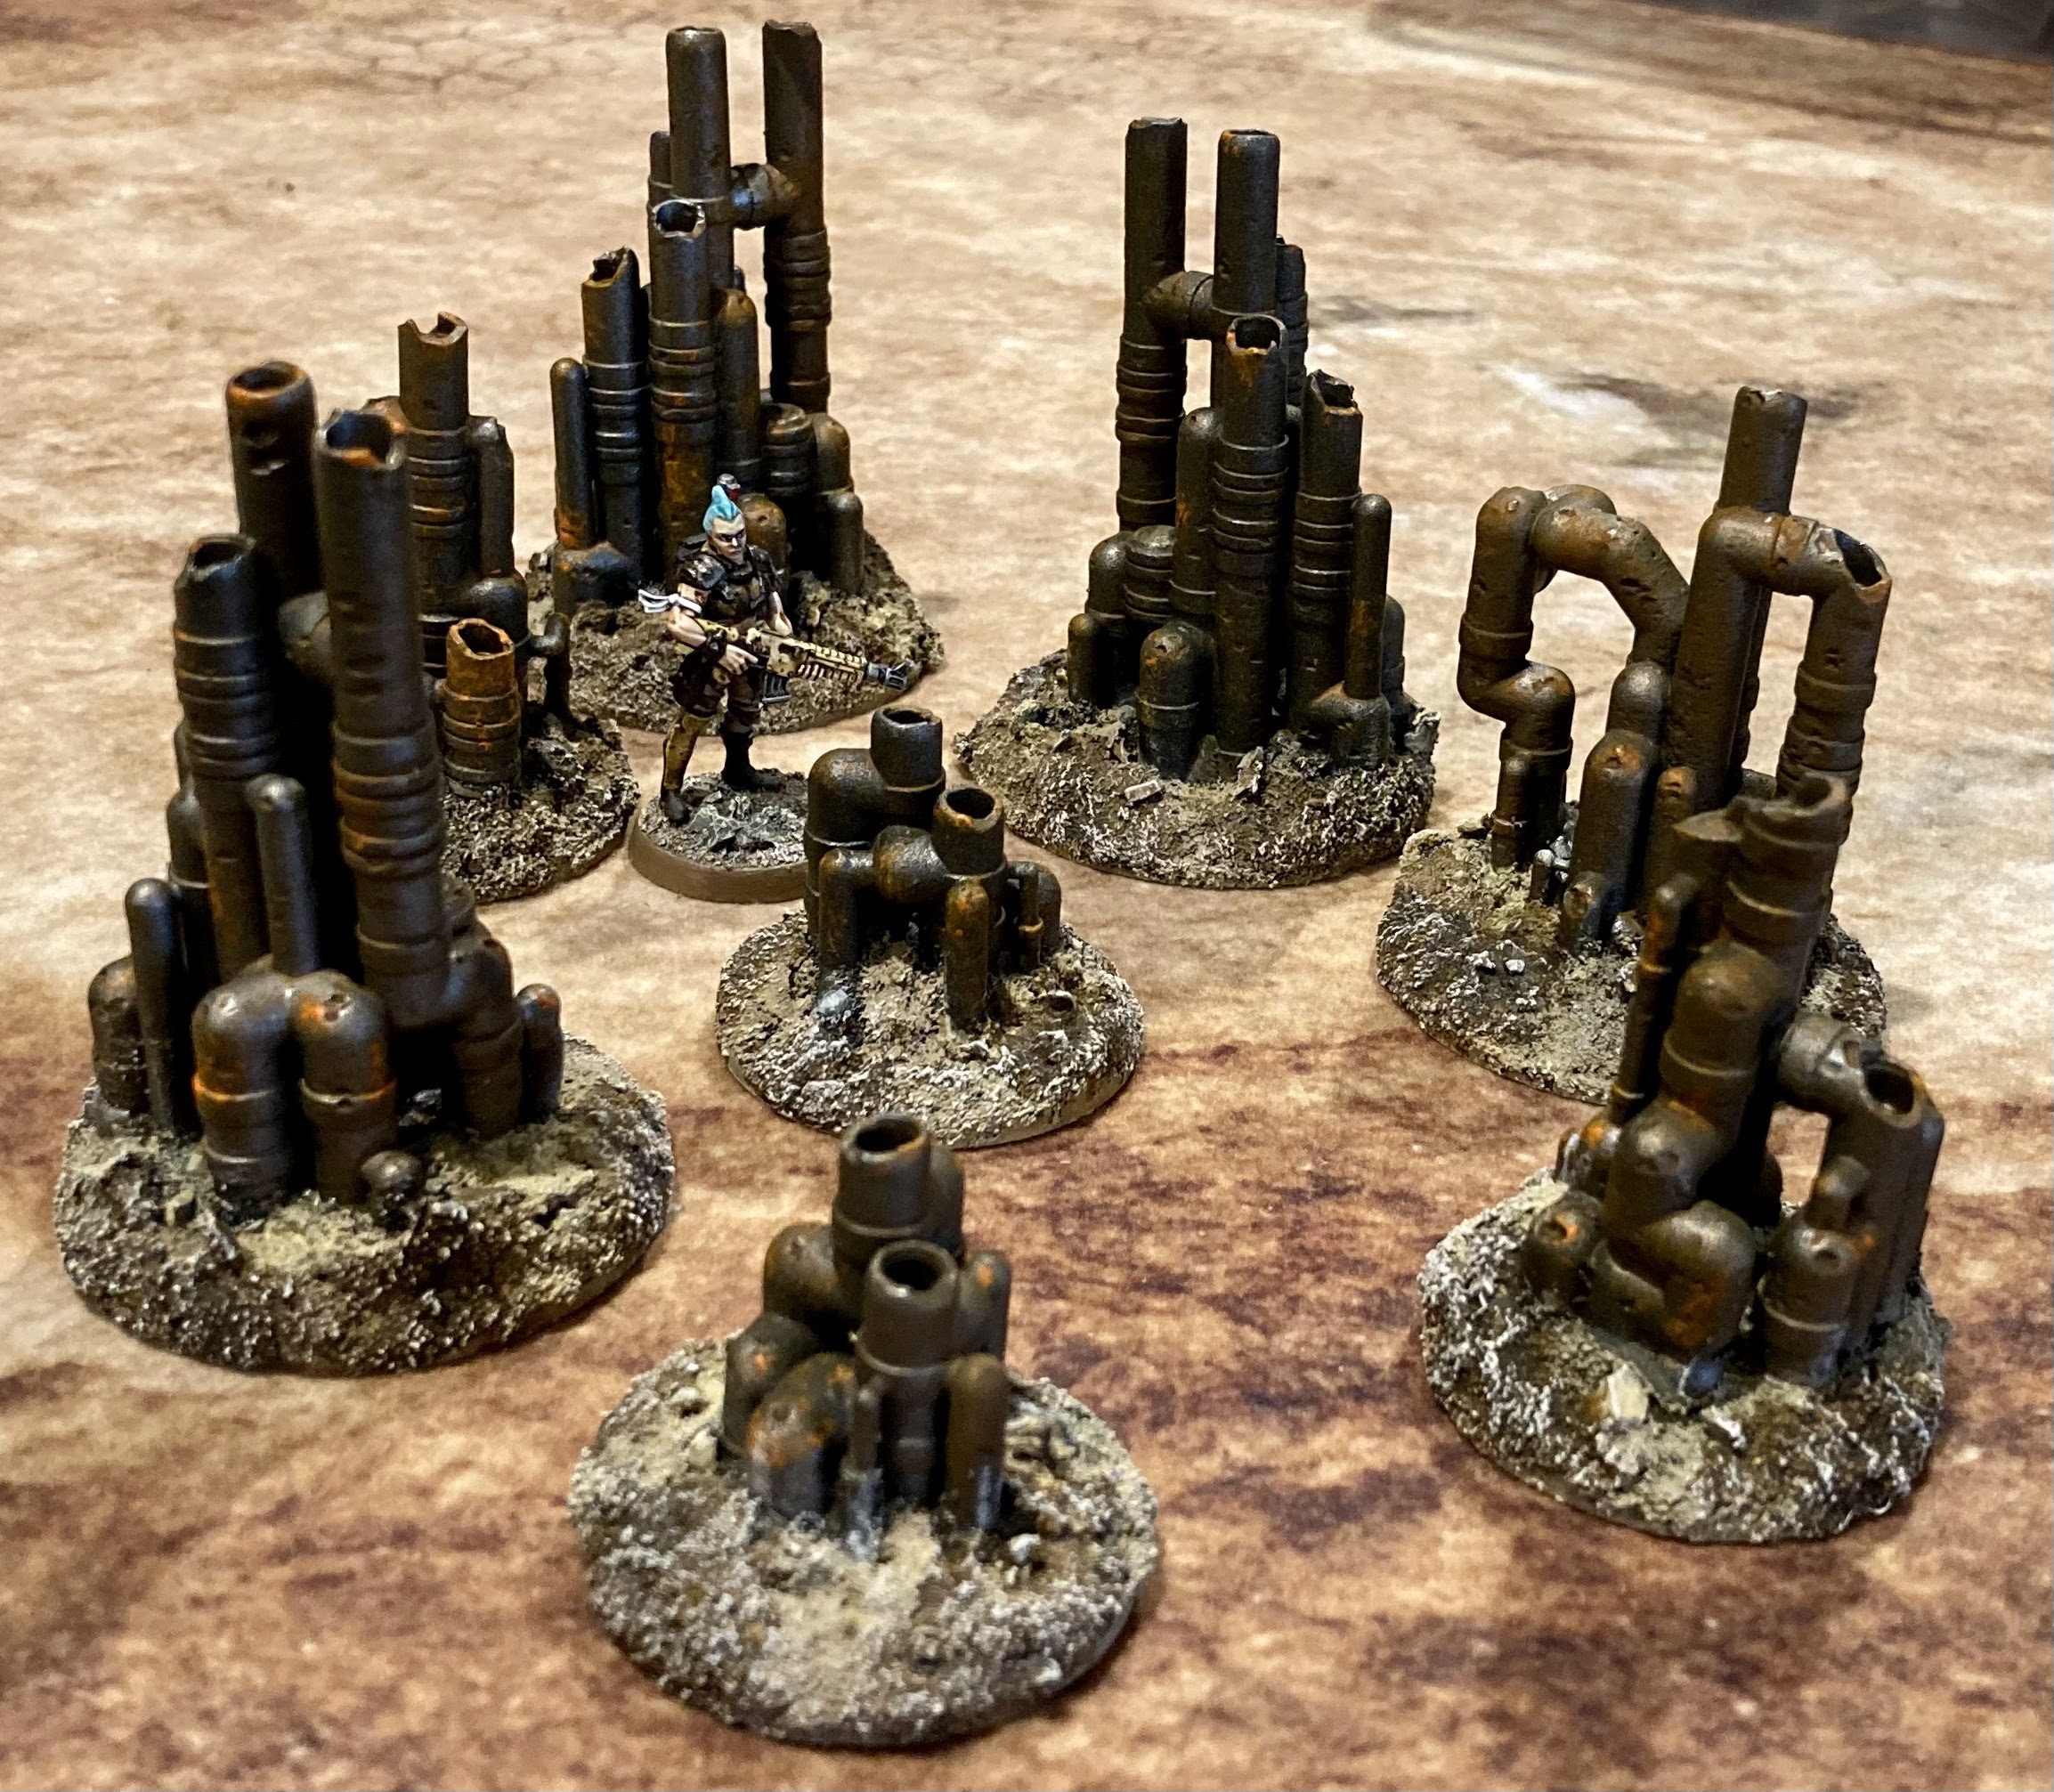
Pipework forest

I've been in a bit of a painting and blogging slump recently. I did some scenery as a quickie to get it off my pile:


I think they're a fun alternative to trees and shrubs. Maybe they're even fungi that have evolved to blend in with an industrial hellscape?

These are resin prints from Fantastic Plants And Rocks. I put them on some round MDF bases which adds a bit of height.

I'm trying to find a quick and reproducible recipe to match my Cigar Box mat. The basing doesn't quite work in the underhive- but maybe toward the sump bottom...

Friday, 1 April 2022

28mm chainlink fencing

I've been neglecting this blog recently as I concentrated on AHPC XII. Last week's battle report had some fencing scenery which I made for the Challenge. My first idea was to use spare 20x100mm bases from Renedra. I also thought I could refashion the sprues as the posts. Here's my first frustrating attempt:

A lot of unsatisfying work to get to this.

Then! I recalled I own a 3D printer. I bodged some simple shapes together on TinkerCAD, an elementary browser-based 3D program.

I'm a 3D sculptor now

Ctrl-C, Ctrl-V

A couple of hours later I had all the fence posts I would need. Much easier than making them from sprue... The top arms were a bit long so I cut them to size. I made some corner bases from plasticard. I cut some aluminium mesh, and secured it with twists of wire. This was fiddly. Then I PVA'd some grit, and sprayed the whole thing grey. I slapped on some browns and orange, and finished the basework. Voilà!

Ready for priming

64" of fencing, 16"x16"


One has a hole

I think I should make a gate*. Maybe some signs which could be swapped out depending on the game I am playing.

Robodoggies from Imitation of Life

* Opening or static? One gate or a pair?

Friday, 4 February 2022

Cacti

Just a quick one today. I improved the biodiversity of my battlefields with some cacti from two sources. The first was Pegasus Hobbies. I picked up two sets on special, and mounted them on 40mm MDF. Some basing, a quick overspray in green and sand, and done. I was pretty happy with them.

Pegasus Hobbies cacti

The second batch are resin 3D prints from Vae Victis, painted and based the same. These are stylistically a bit chunkier than the Pegasus ones, but you don't really notice. You can scale them up and down to add as much variety as you want. I'm a big fan.

Vae Victis cacti.
The skull is from Great Escape Games.

They're all on 40mm MDF bases. I have thoughts of doing sabot area bases. I'm also recalling the classic 40K styrofoam balls with red cocktail sticks... 

Cacti patches side by side.

Friday, 17 December 2021

40K Ryza Ruins

I've had these for a few years, but following a surge in my interest in grimdark skirmishes, it was time to get them painted. I prefer my scenery to merge with the tabletop rather than plonk directly onto it, so cut and sanded some MDF bases. I had a flash of inspiration and used Renedra square bases to make some interior floor tiling for texture. I also had a 3D printed crater floating about which I glued down on one base and I think works well. I built up the groundwork using Sculptamold for the first time, which I was pretty happy with. Then I glued down rubble and sand with a lot of watery PVA. I sprayed them black, then an overspray of gunmetal. I sponged on some orange, then a watery coat of red-brown craft paints. Finally I dry brushed the bases in browns and creams. There is plenty of detail I have not picked out.


The collection

The raised hoarding gives a slight Old West feel to this one building only, but I am not sure if I really like this.


I left the roofs separate for ease of painting with the intent of gluing them later, but they are a snug and secure fit so I have left them unglued.


The buildings can match with GW pipes, but they are a little offset due to my MDF bases.


I cannot decide if I prefer the modularity of two separate corners, or if I would have preferred the aesthetic appeal of one larger base.


Overall, I like these sturdy pieces and you will see them often.

Friday, 21 August 2020

3D printed Mirkwood

Spider attack!

I've been dabbling with 3D printing some scenery for Journeys in Middle-earth. I printed these gnarly trees from Printable Scenery and based them on 80mm bases. I was going to add Woodland Scenics clump foliage, but I wasn't super-impressed with the appearance after doing one. I thought the bare branches are actually pretty atmospheric and menacing. What do you think? Should I add greenery or not? Maybe a darker green?

Gnarly trees

Fallen trees